Introducing new Pay As You Go
Signing up for a Foursquare Developer account is free. Upon sign up, your account will be Pay As You Go with $200 worth of free credit usage per month.
Have more questions? Read our Pay As You Go FAQs.
View Remaining Balance & Plan Type
The Remaining Balance section shows your current available balance which includes both your free $200 credits gifted to you by Foursquare every month as well as whatever credit you have purchased.
For example, the current balance of $900 seen below includes both the $200 of free credits plus $700 of purchased credits.
NOTE: Foursquare will use the $200 in free credits first when charging for API calls. Once you've used those credits, we will then use the credit you have purchased.

Manage Payments
The Manage Payments section gives you the flexibility to pay via automatic or manual payments.
NOTE: Use of this section requires having a credit card on file.
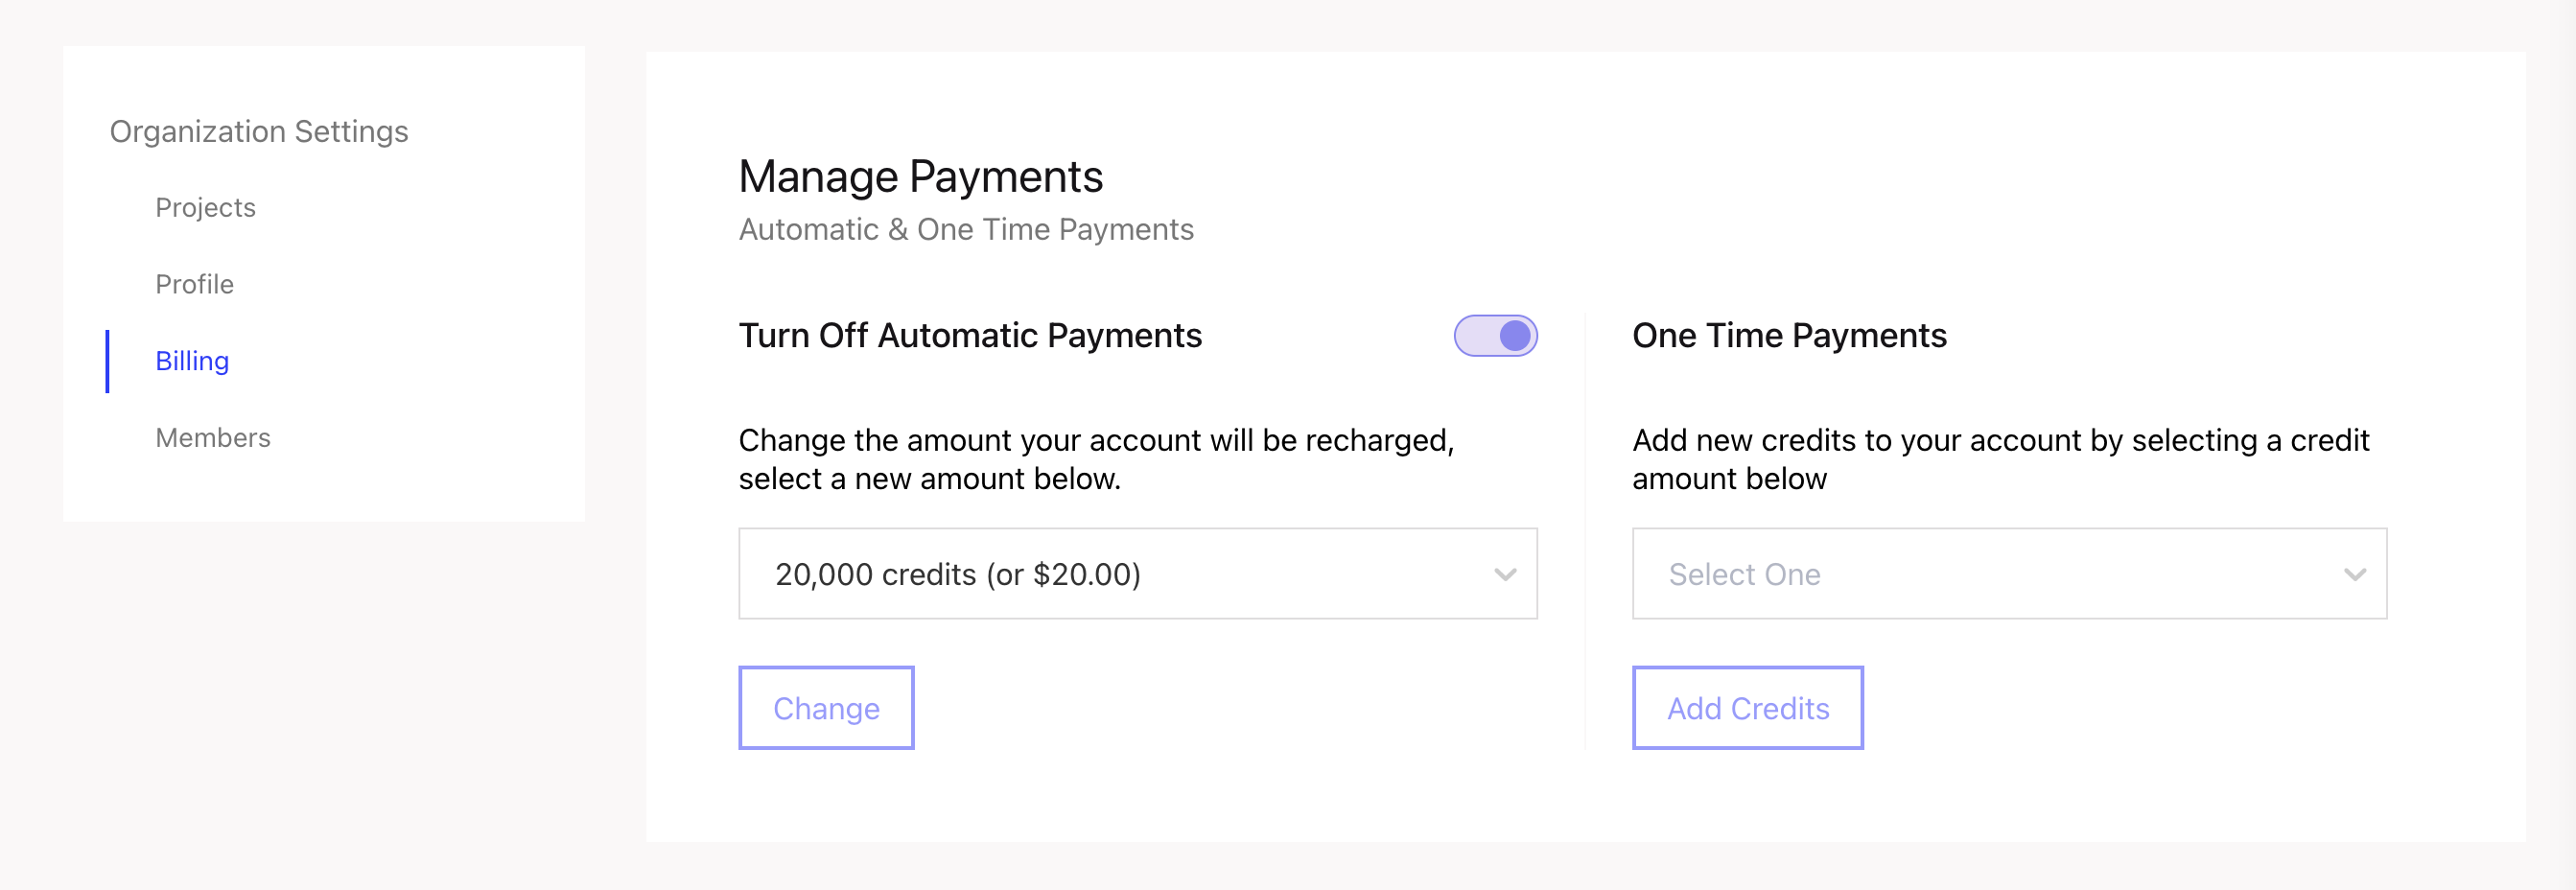
Automatic Payments
By default, automatic payments are turned on to ensure seamless coverage when making API calls. When selecting the amount your account will be recharged when you've used all of your current credits, you can select from a range of credit amounts.
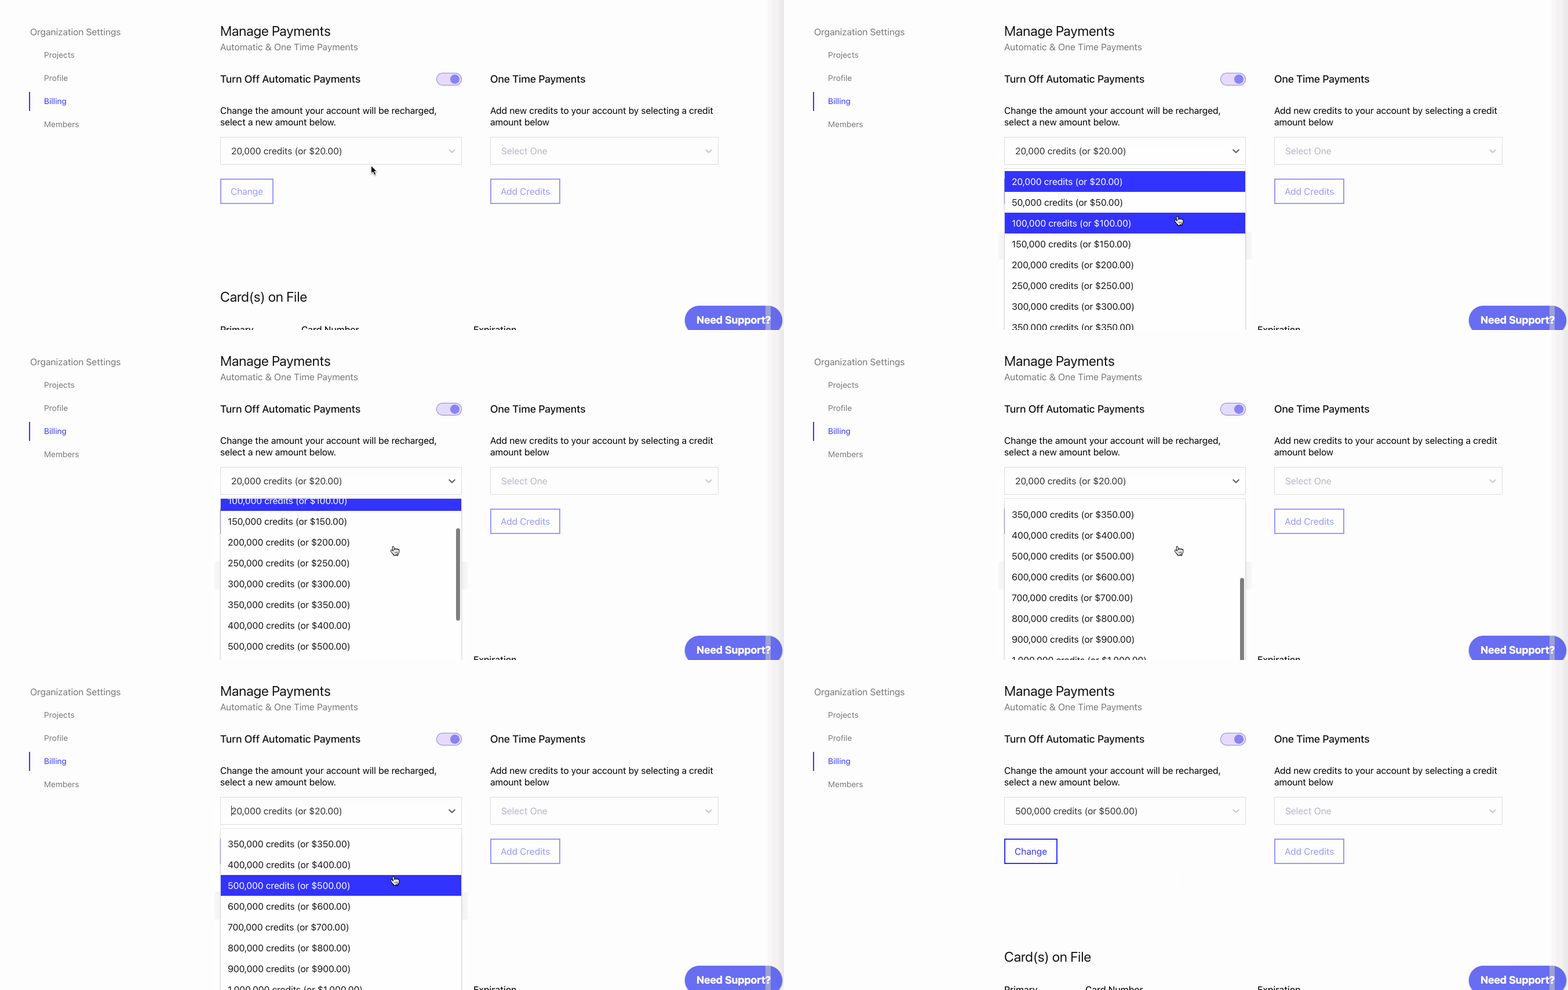
To select the amount you want your account to be recharged:
- In the Manage Payments section of the Billing page, click on the drop-down.
- Select your preferred amount.
- Click Change.
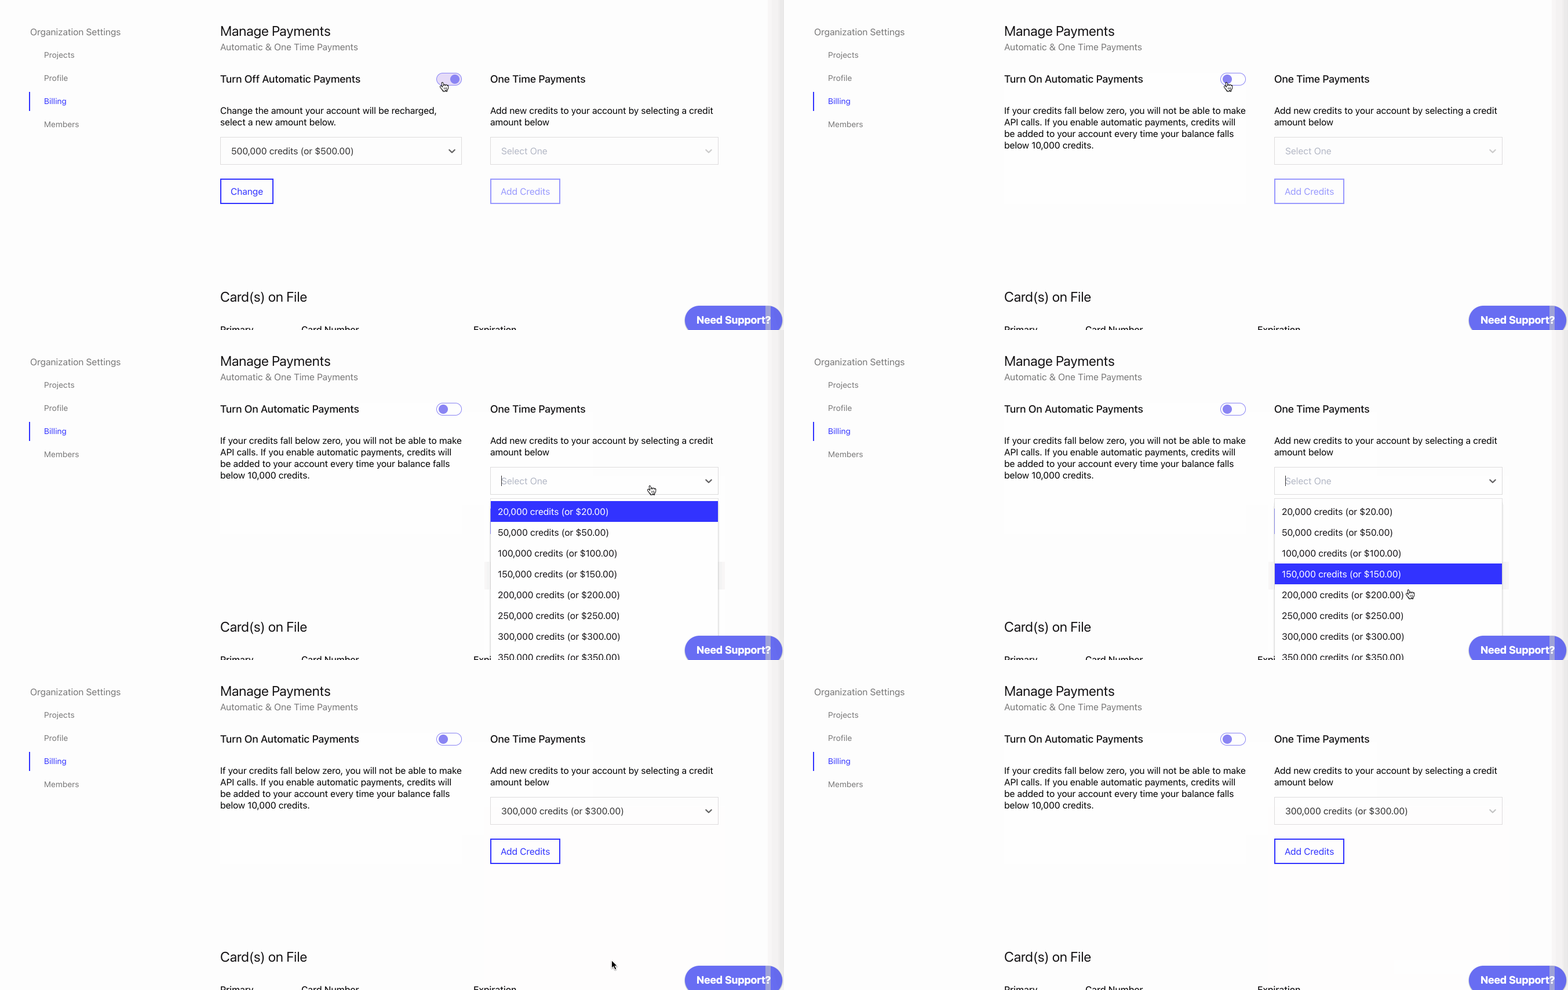
One Time Payments
If you prefer to make one time payments instead:
- In the Manage Payments section on the Billing page, click the Turn Off Automatic Payments toggle.
- In the drop-down, select your amount of preferred credits.
- Click Add Credits.
View/Add New Cards
The Card(s) on File section contains an overview of your current cards on file to be used as payment.

While you are not required to have a credit card on file if you are a Pay As You Go customer, we do recommend adding one to ensure continuous coverage should you make more API calls than you currently have credit for.
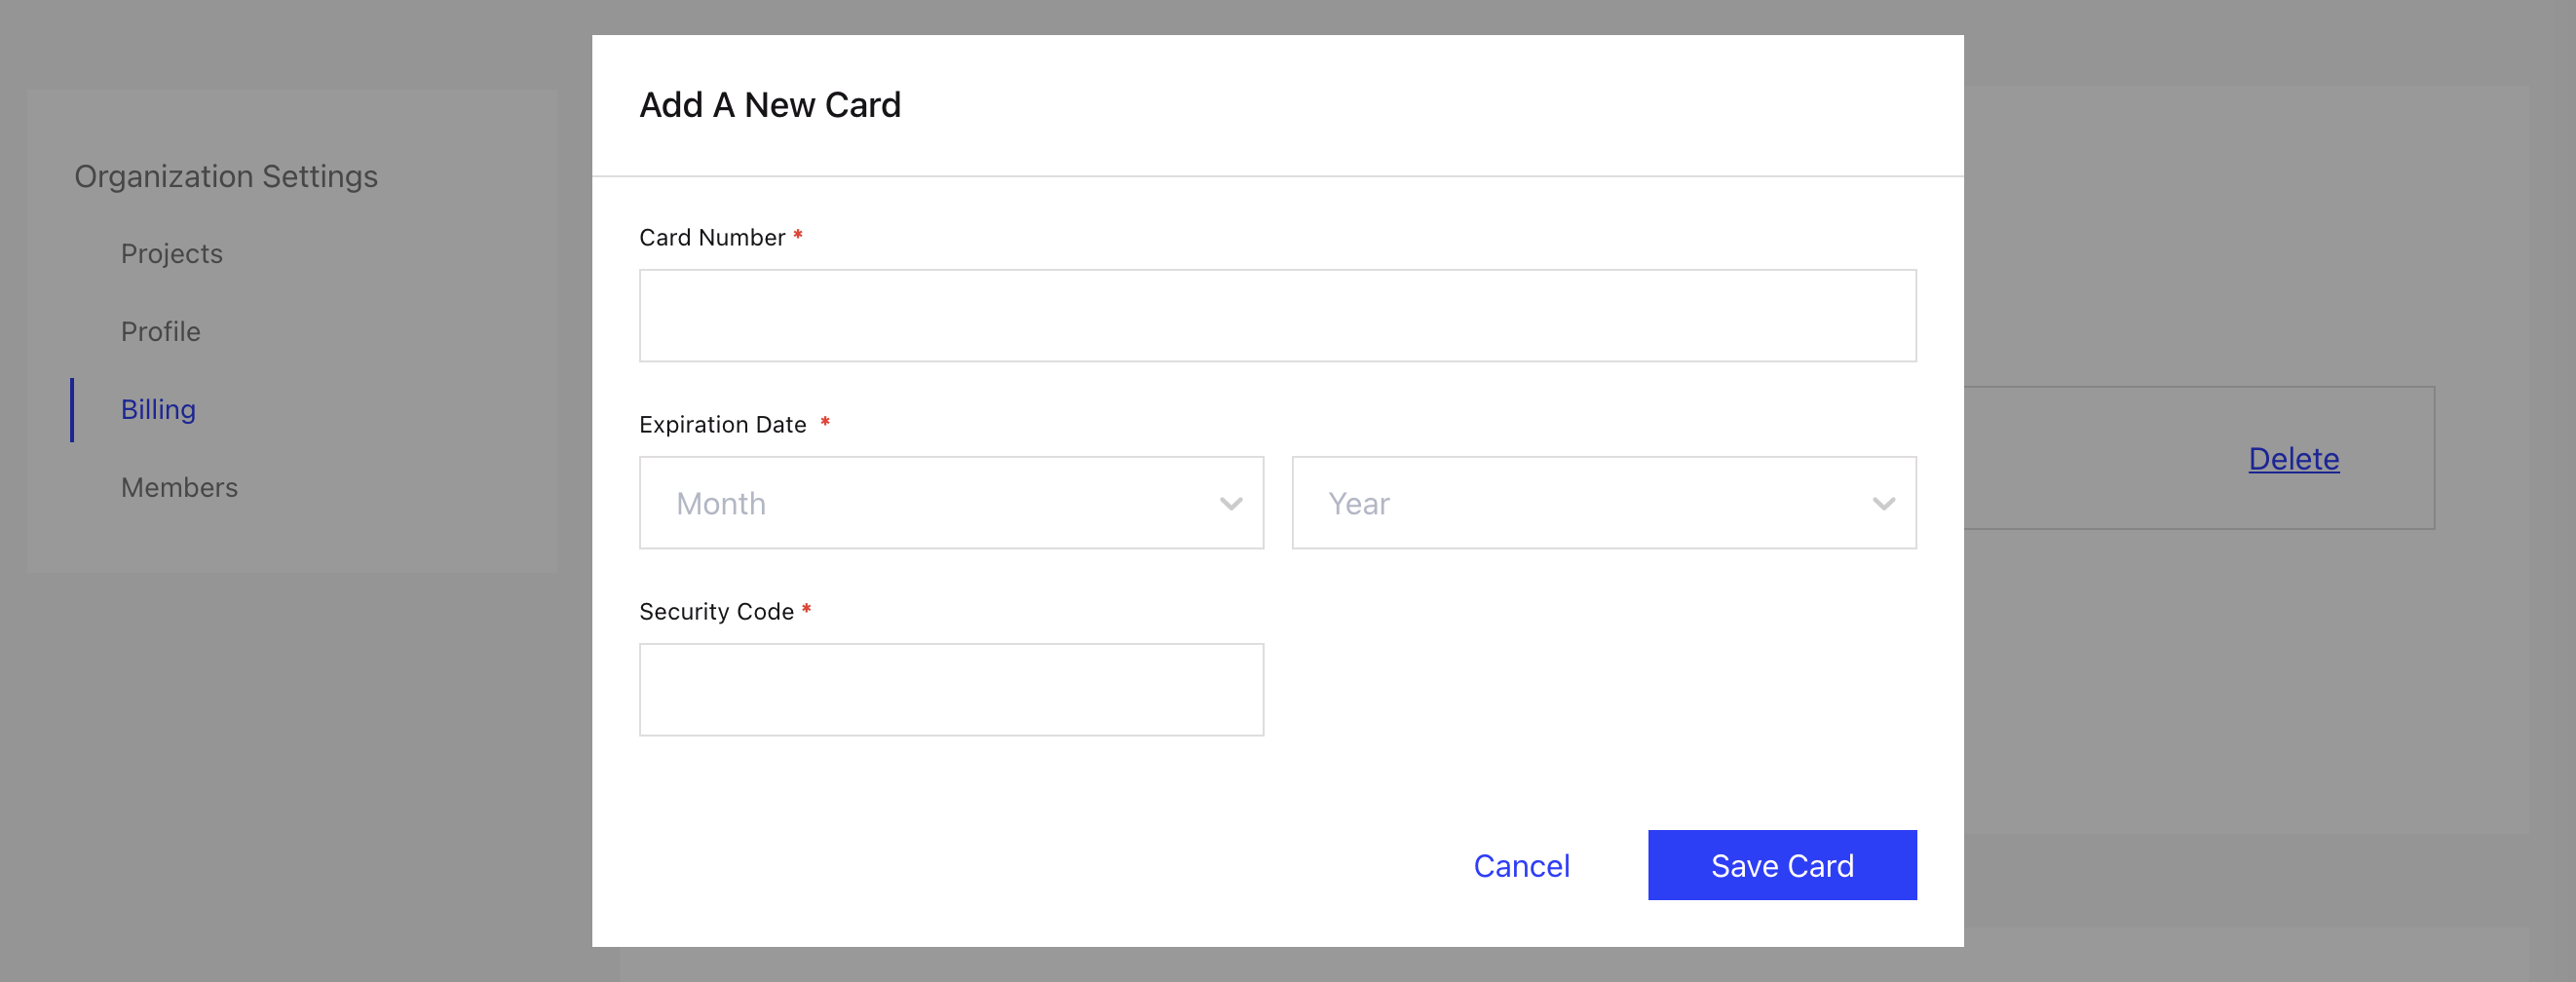
To add a new credit card:
- On the Billing page, in the Card(s) on File section, click Add New Card.
- In the Add New Card modal, provide the following information:
- Card Number
- Expiration Date
- Security Code
- Click Save Card.
NOTE: While you can have multiple cards on file, you will need to mark one as the Primary to let us know which card you prefer us to charge.
View Billing Summary
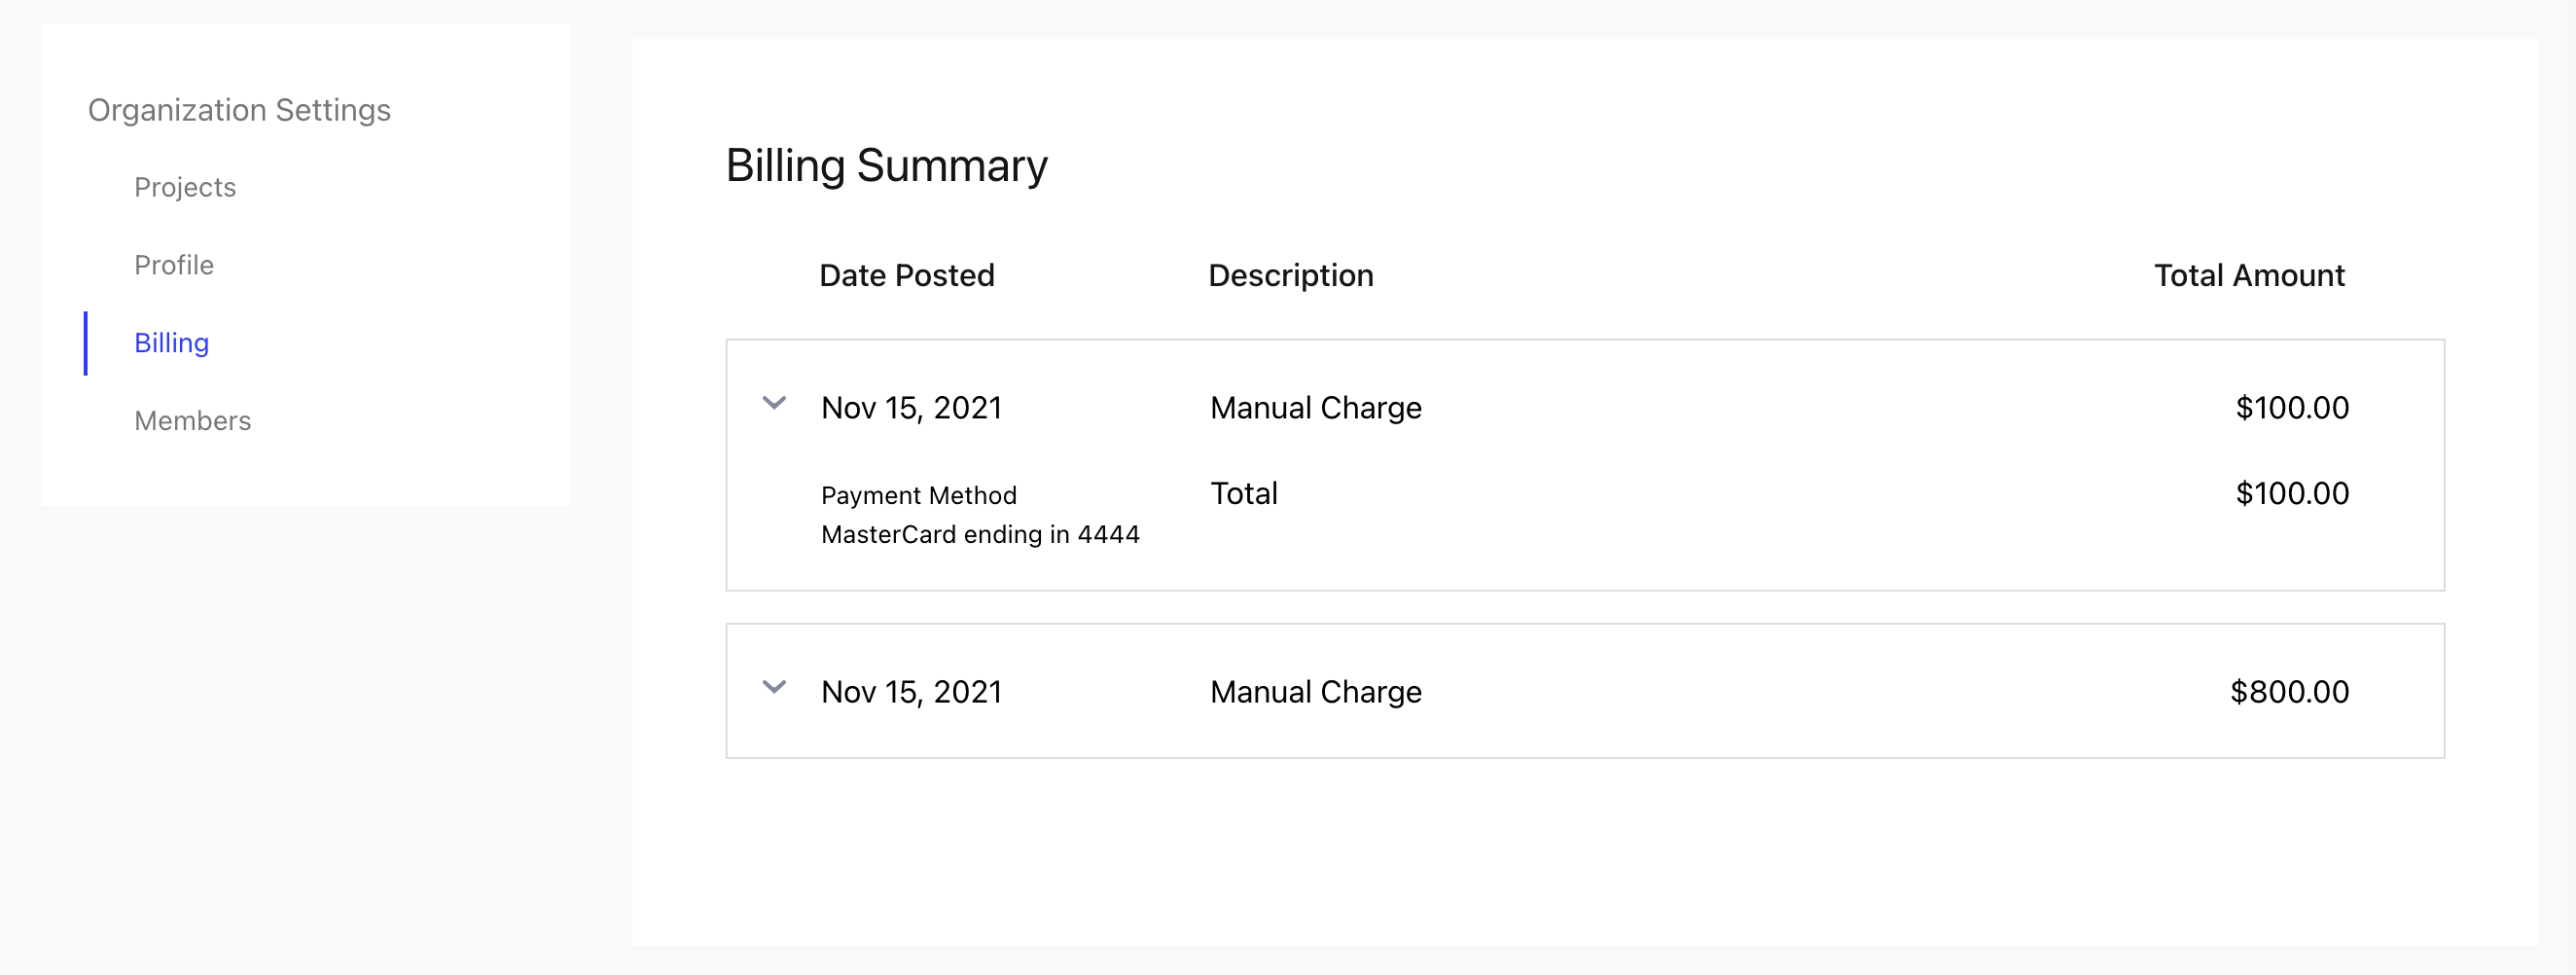
The Billing Summary section provides an overview of your most recent charges with the Date Posted, Description and Total Amount shown.
View Transaction History
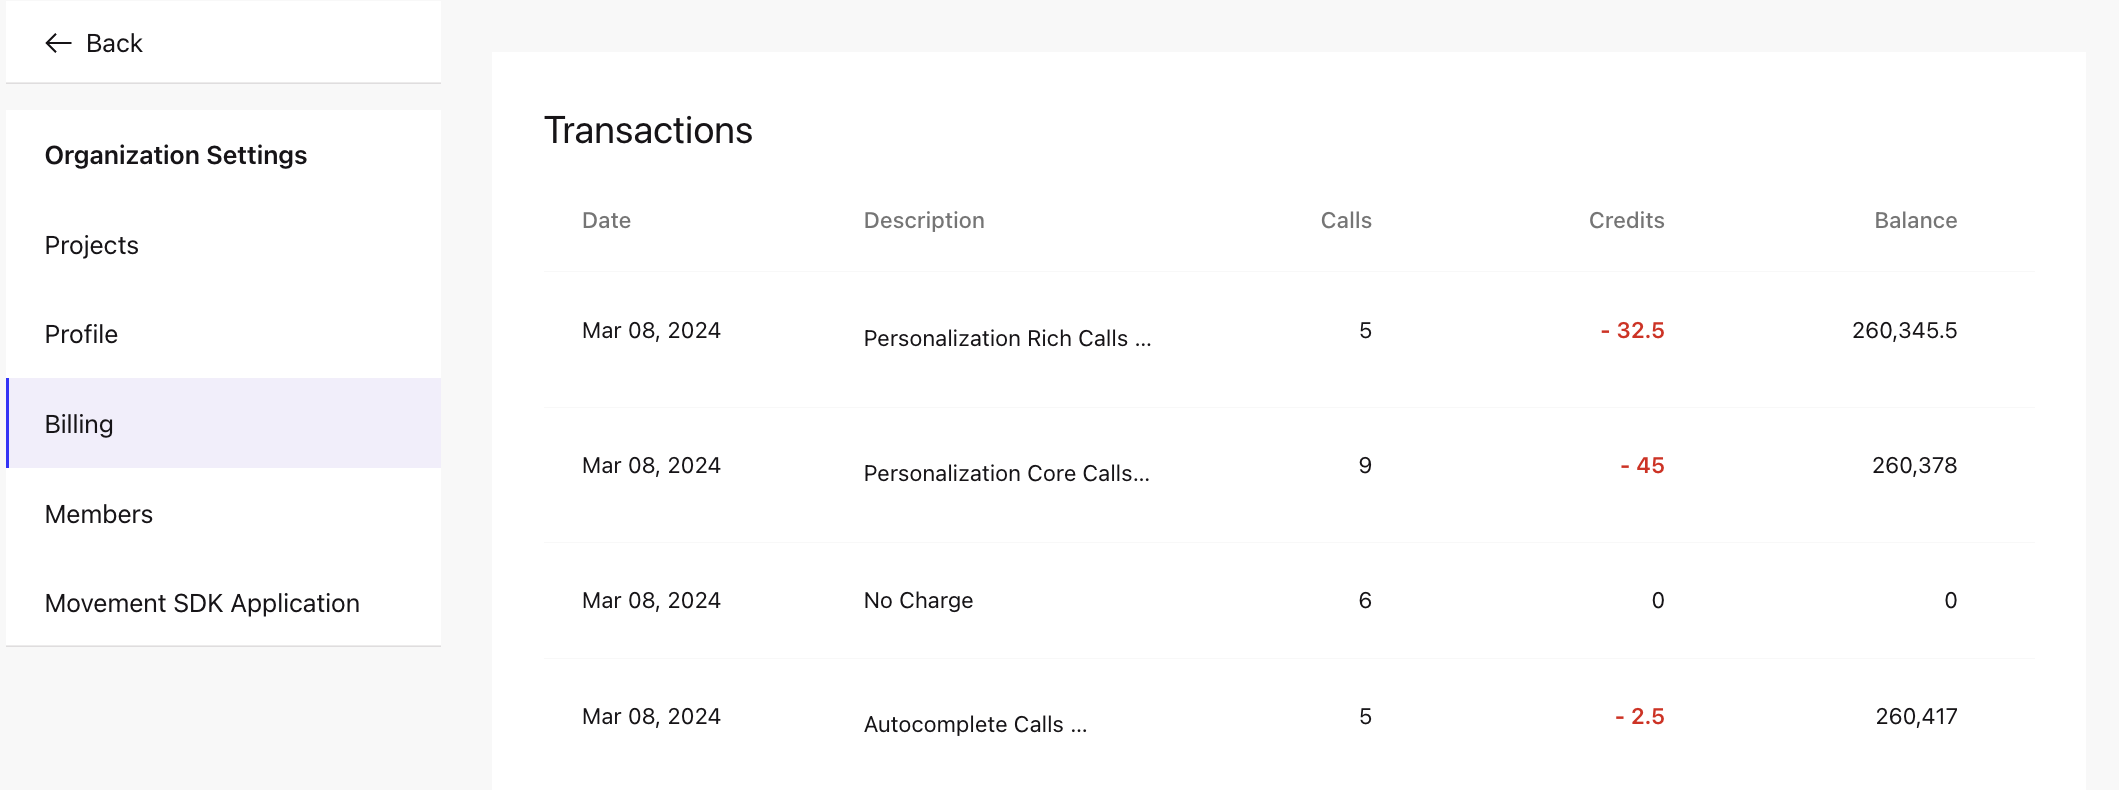
The Transactions section provides an overview of the last 60 transactions - both debits and credits - to your account.
Each line item includes the following information about the transaction:
- Date
- Description
- Calls
- Credits
- Balance
Please see the Personalization API pricing for detailed information on call types and prices to better understand your transaction history.
