
Create Vector Tiles
You can transform geospatial datasets into Vector Tiles through Studio's dashboard. Vector Tile generation allows you to transform massive datasets into an optimized, streamed set of tiles.
Prerequisites
Vector Tiles are generated from geometries in a tabular source dataset. To be transformed into Vector Tiles, your dataset must be uploaded to Studio and fulfill the following criteria:
- A GeoJSON tileset (where each row contains geometry and optionally a properties fields)
- A CSV file with latitude and longitude columns.
More formats coming!
We are exploring other data formats for vector tile generation. Stay tuned!
Vector Tiles Creation Guide
Follow the steps below to create Vector Tiles from your dataset:
- Navigate to the Datasets tab in your Workspace.
- Select any supported dataset, then click Vector Tile.
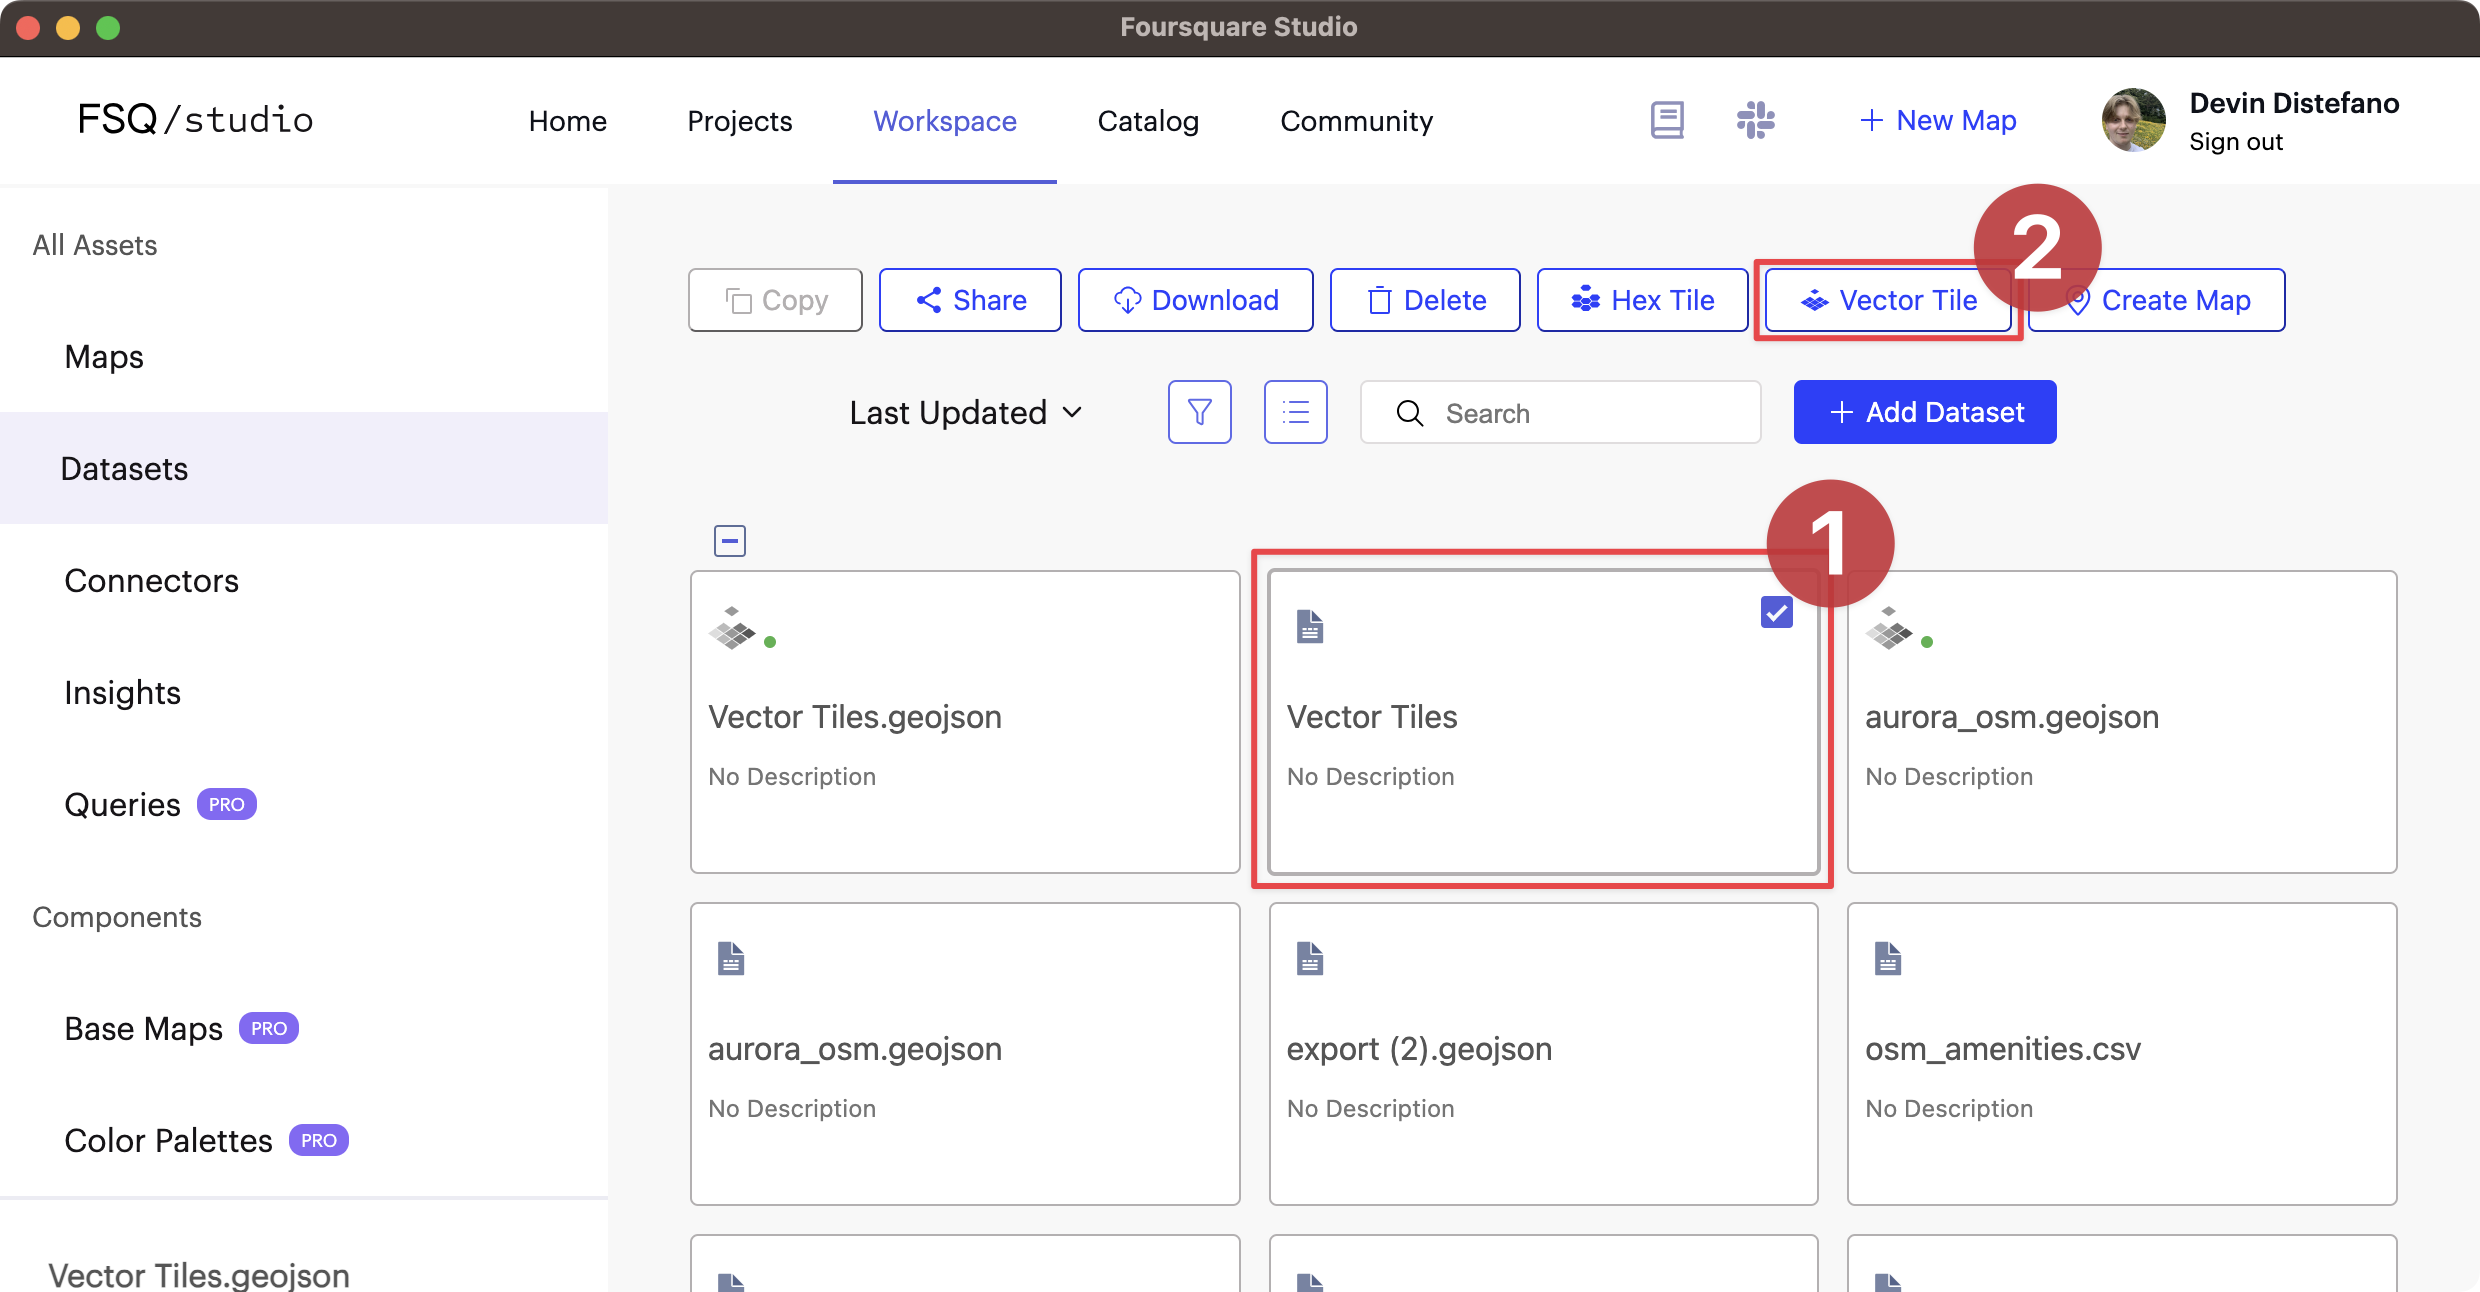
Steps for vector tiling a dataset in Studio.
- Fill all fields in the Create Vector Tiles Dataset window.
A modal will appear requesting your confirmation. The information required depends on your dataset:
.geojsonfiles will be automatically scanned for geometry.csvfiles require that you select the geometry column input of your geometry. Select thelatitudeandlongitudecolumns to use for the vector tiling process.attribute columns- Select which attribute columns to keep or exclude all attributes. Choosing more attributes can significantly increase feature sizes and lead to features being dropped from tiles at lower zooms.tile size- Choose one from predefined options, Small, Medium and Large or add custom value. Choosing a larger tile size will keep more features visible at when zoomed out but will increase load times.
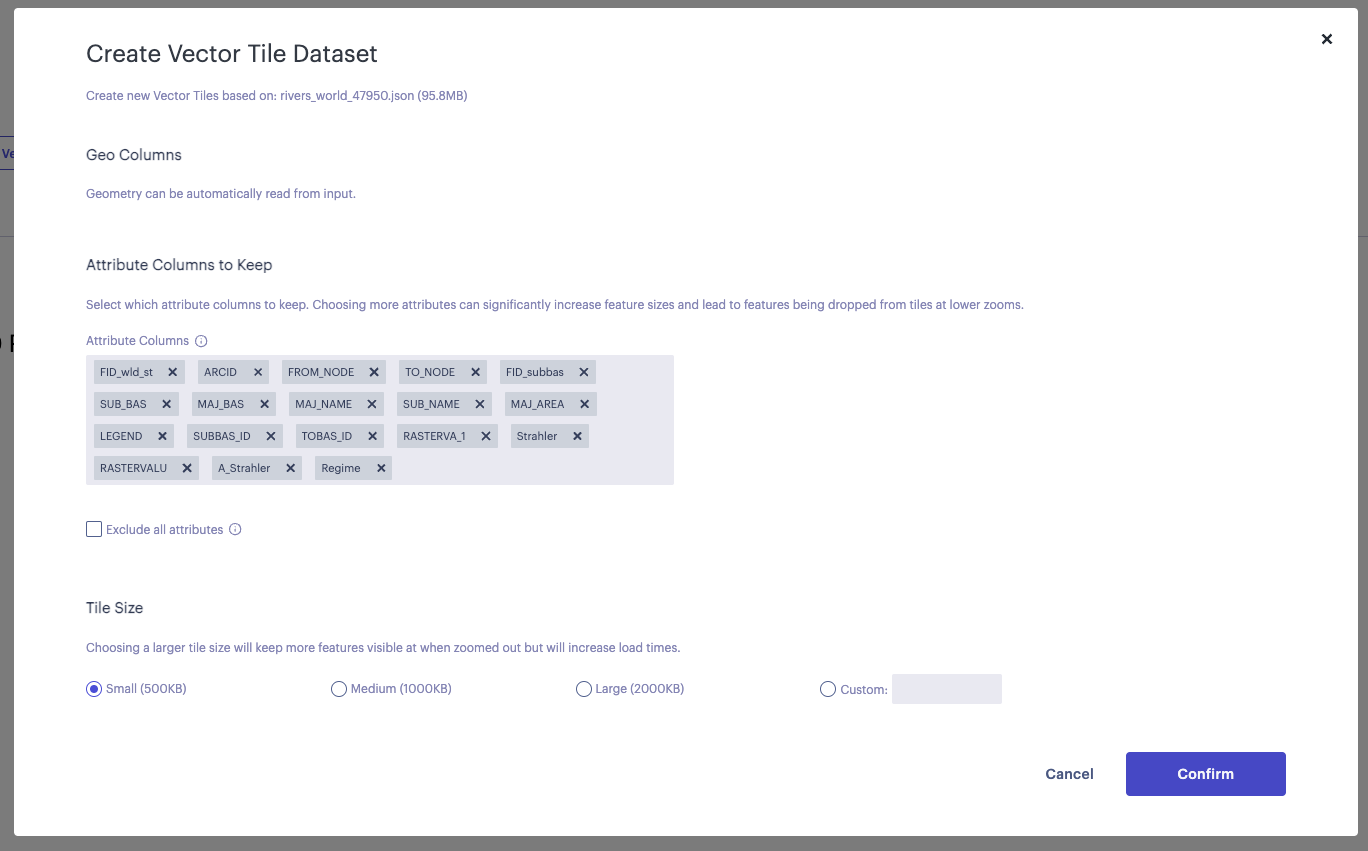
Vector tile creation options modal.
- Initiate the vector tiling process by clicking Confirm.
Check the status of your Vector Tiles by observing the indicator icon above your new dataset.
| Indicator Icon | Description |
|---|---|
| 🟡 (Yellow) | The tiling process is still running. |
| 🟢 (Green) | The tiling process is complete and the Vector Tiles can be used. |
| 🔴 (Red) | The tiling process failed. Select the dataset to view the error message. |
CSV Processing: More Information
Currently, only point geometry is supported for CSV vector tiling. More geometries will be supported in the future.
An easy workaround (without leaving Studio) is to simply bring your CSV dataset into Studio and then export it as a GeoJSON. You can even make use of features such as Shapify to generate geometries from official US boundaries.
However, please consider that large CSVs with many columns may not be optimized for GeoJSON format, resulting in poor performance and potentially crashing.
Directly upload/download PMTiles files
You can now upload external vector tile datasets in the PMTiles file format directly to the Studio cloud, creating a new dataset. You can also download vector tiles generated by Studio as PMTiles files that you can use in other tools.
Using Vector Tiles
Out of the box, Foursquare Studio should visualize your Vector Tiles and zoom to their bounds, giving you a great start to exploring your dataset.
The Visualize guide offers a complete guide for visualizing vector tiles. Use advanced layer settings and visualization features to get the most out of your Vector Tiles.
Generate Vector Tiles via API
You can also generate Vector Tiles programmatically, allowing vector tile generation to be a part of your team's workflow.
For those who wish to use Python/CLI bindings, please refer to the Data SDK reference to learn how to create Vector Tiles through the SDK.
Alternatively, use the Vector Tiling API endpoint directly. Use our API explorer to try out the endpoint from your browser.
Updated 2 months ago