
Split Map Modes
Using Split Map modes, interact with two synchronized maps displayed side-by-side (Dual Maps) or overlaid (Swipe Maps).
The two maps in Split Modes can show different data layers, letting you make quick visual comparisons between different data sets.
To change the split mode, click the Split Mode button.
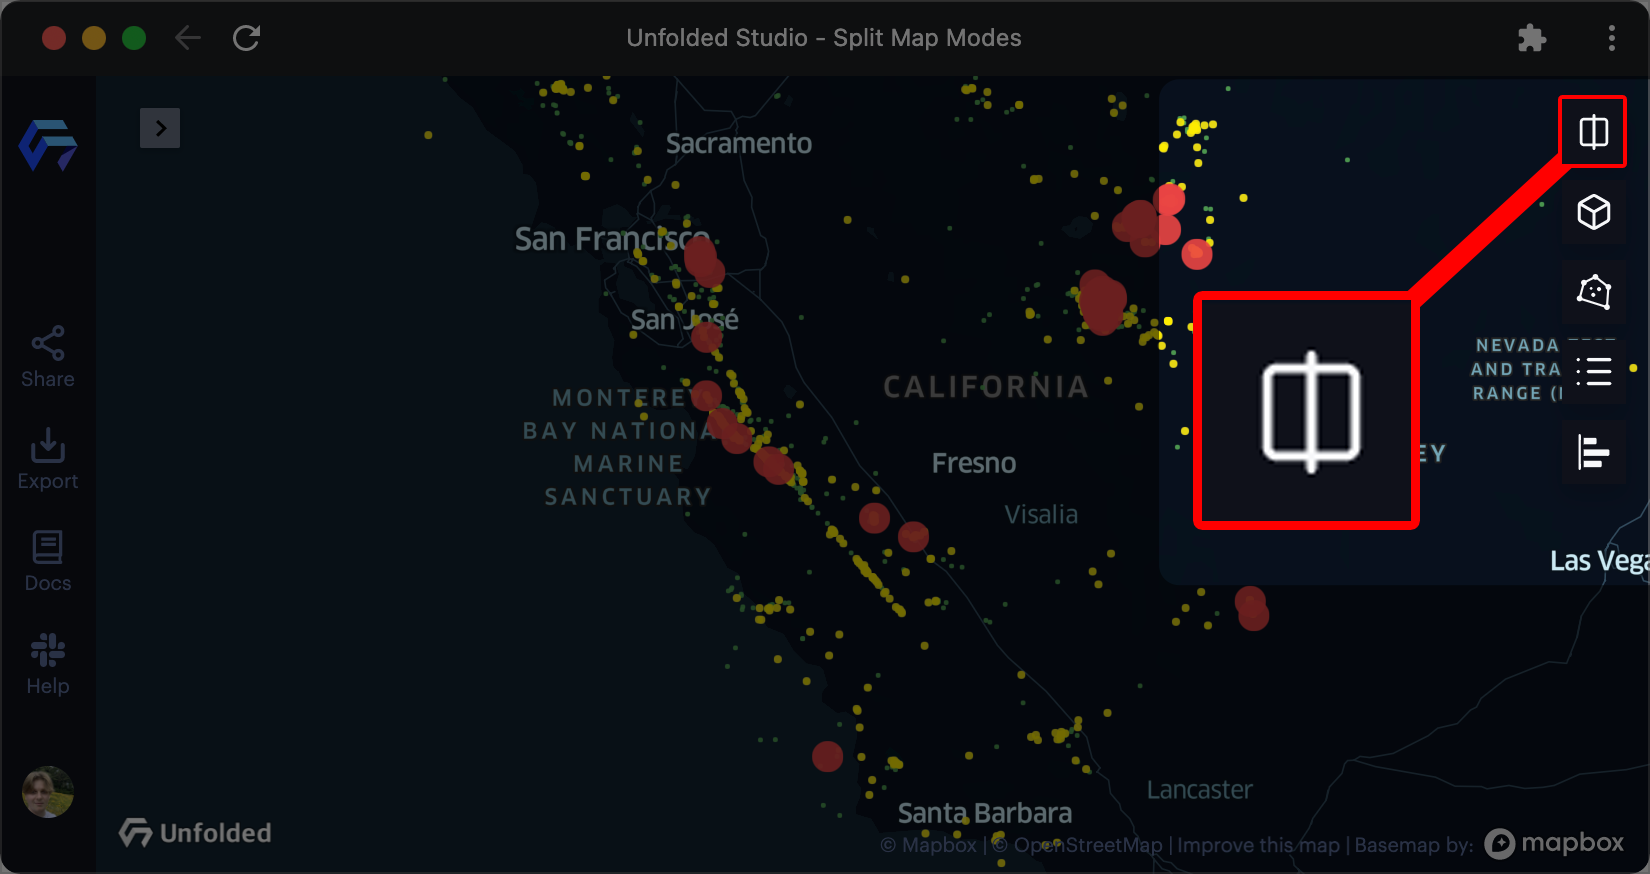
The Split Map button in Studio.
After clicking the button, select one of three options:
Single Map Mode
Use Single Map mode to display a single view of your map. This is the default view mode.
Dual Maps Mode
Use Dual Maps mode to display a synchronized side-by-side comparison of the same map area with your choice of layers.
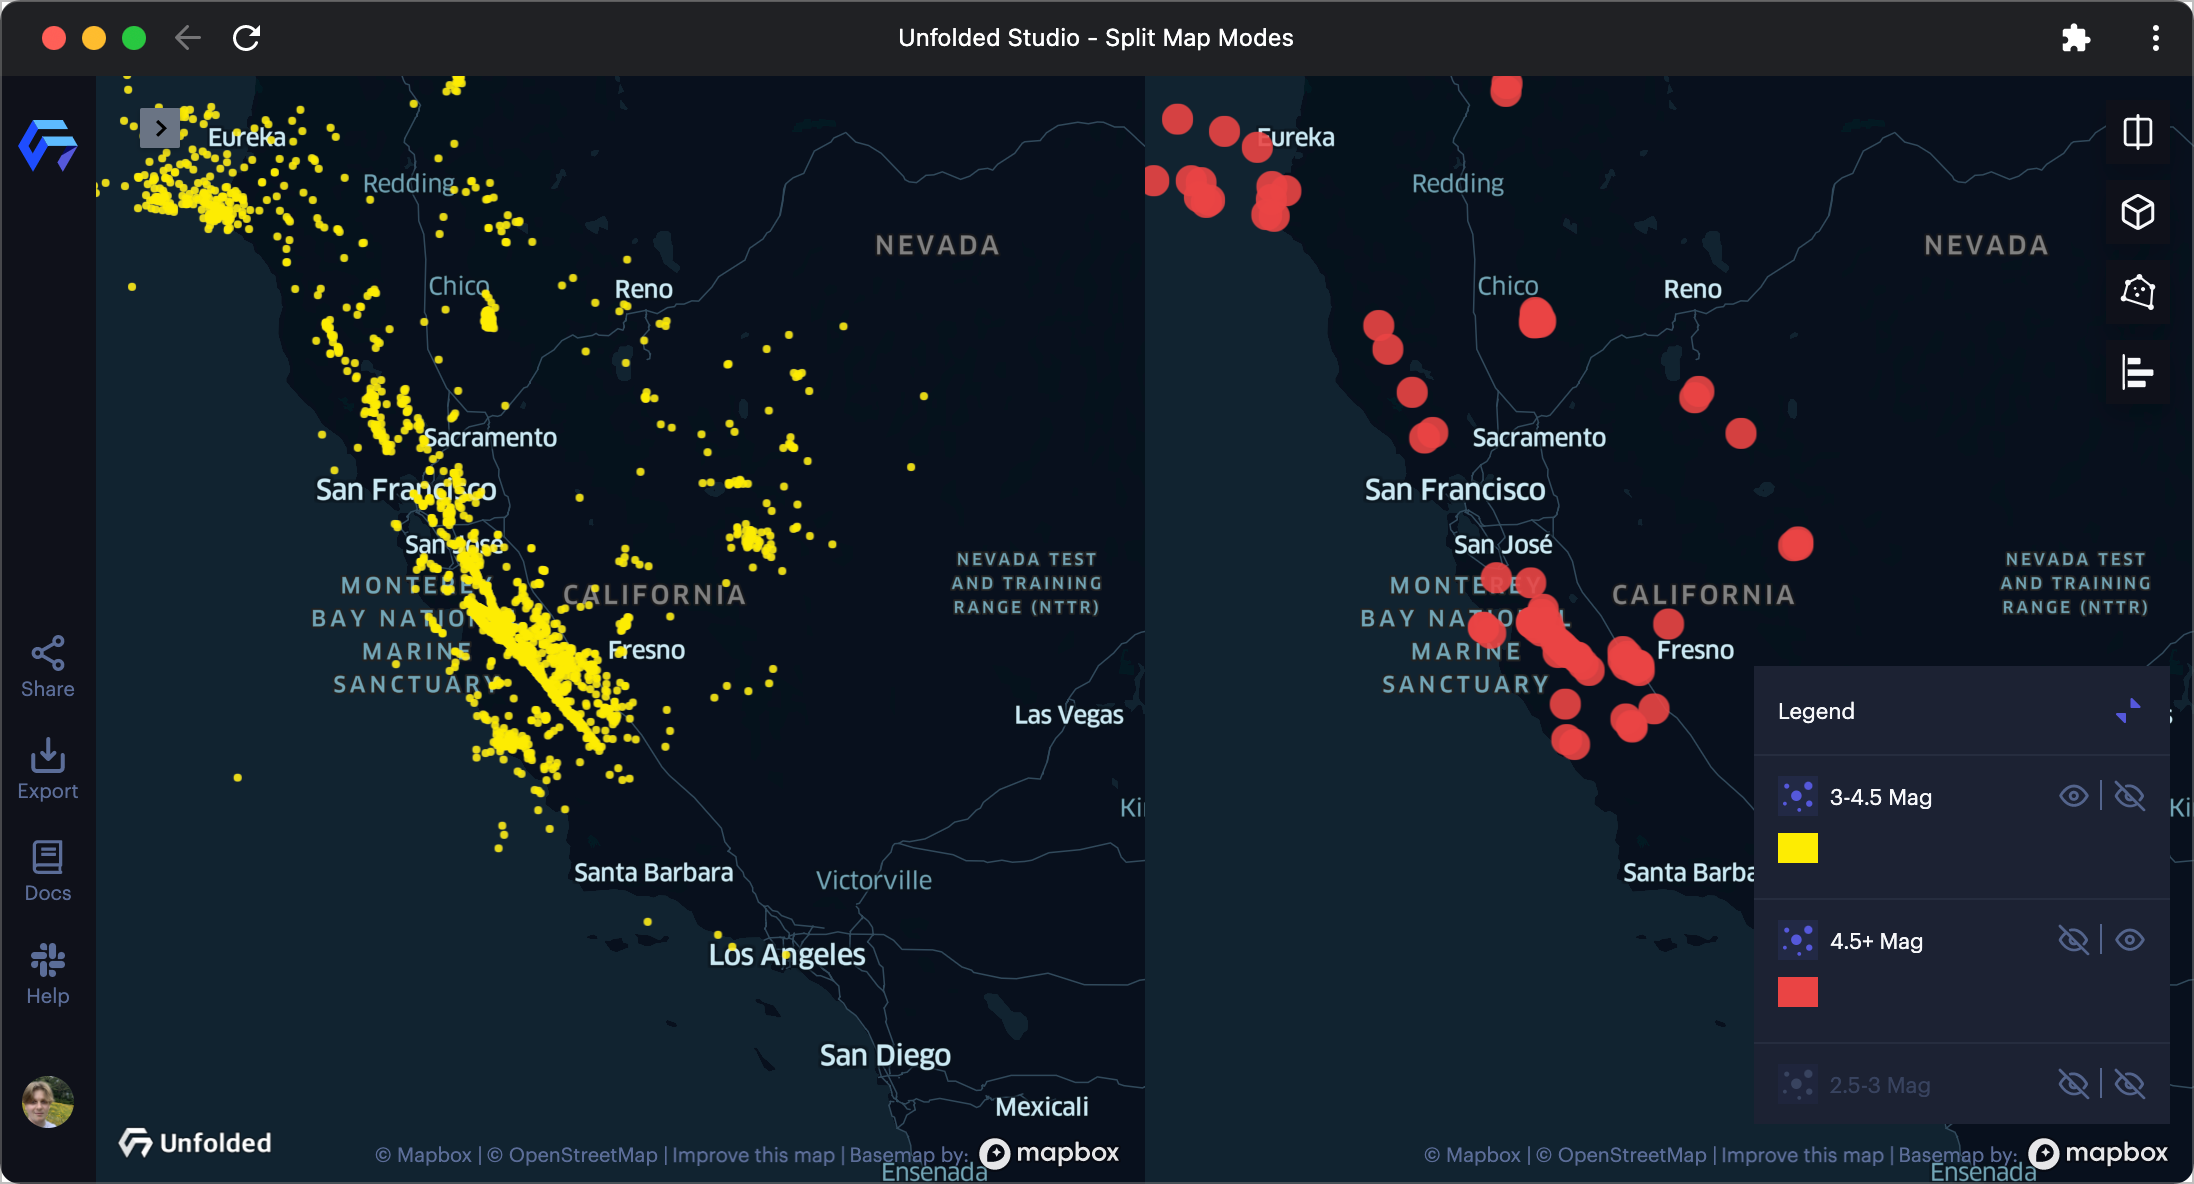
Earthquake data in Dual Map mode.
Click Unlock Viewport to decouple the map's shared viewport, allowing you to compare two areas of the map side-by-side.
Toggle Synchronize Zooms to unlock zoom levels for each map in dual map mode.
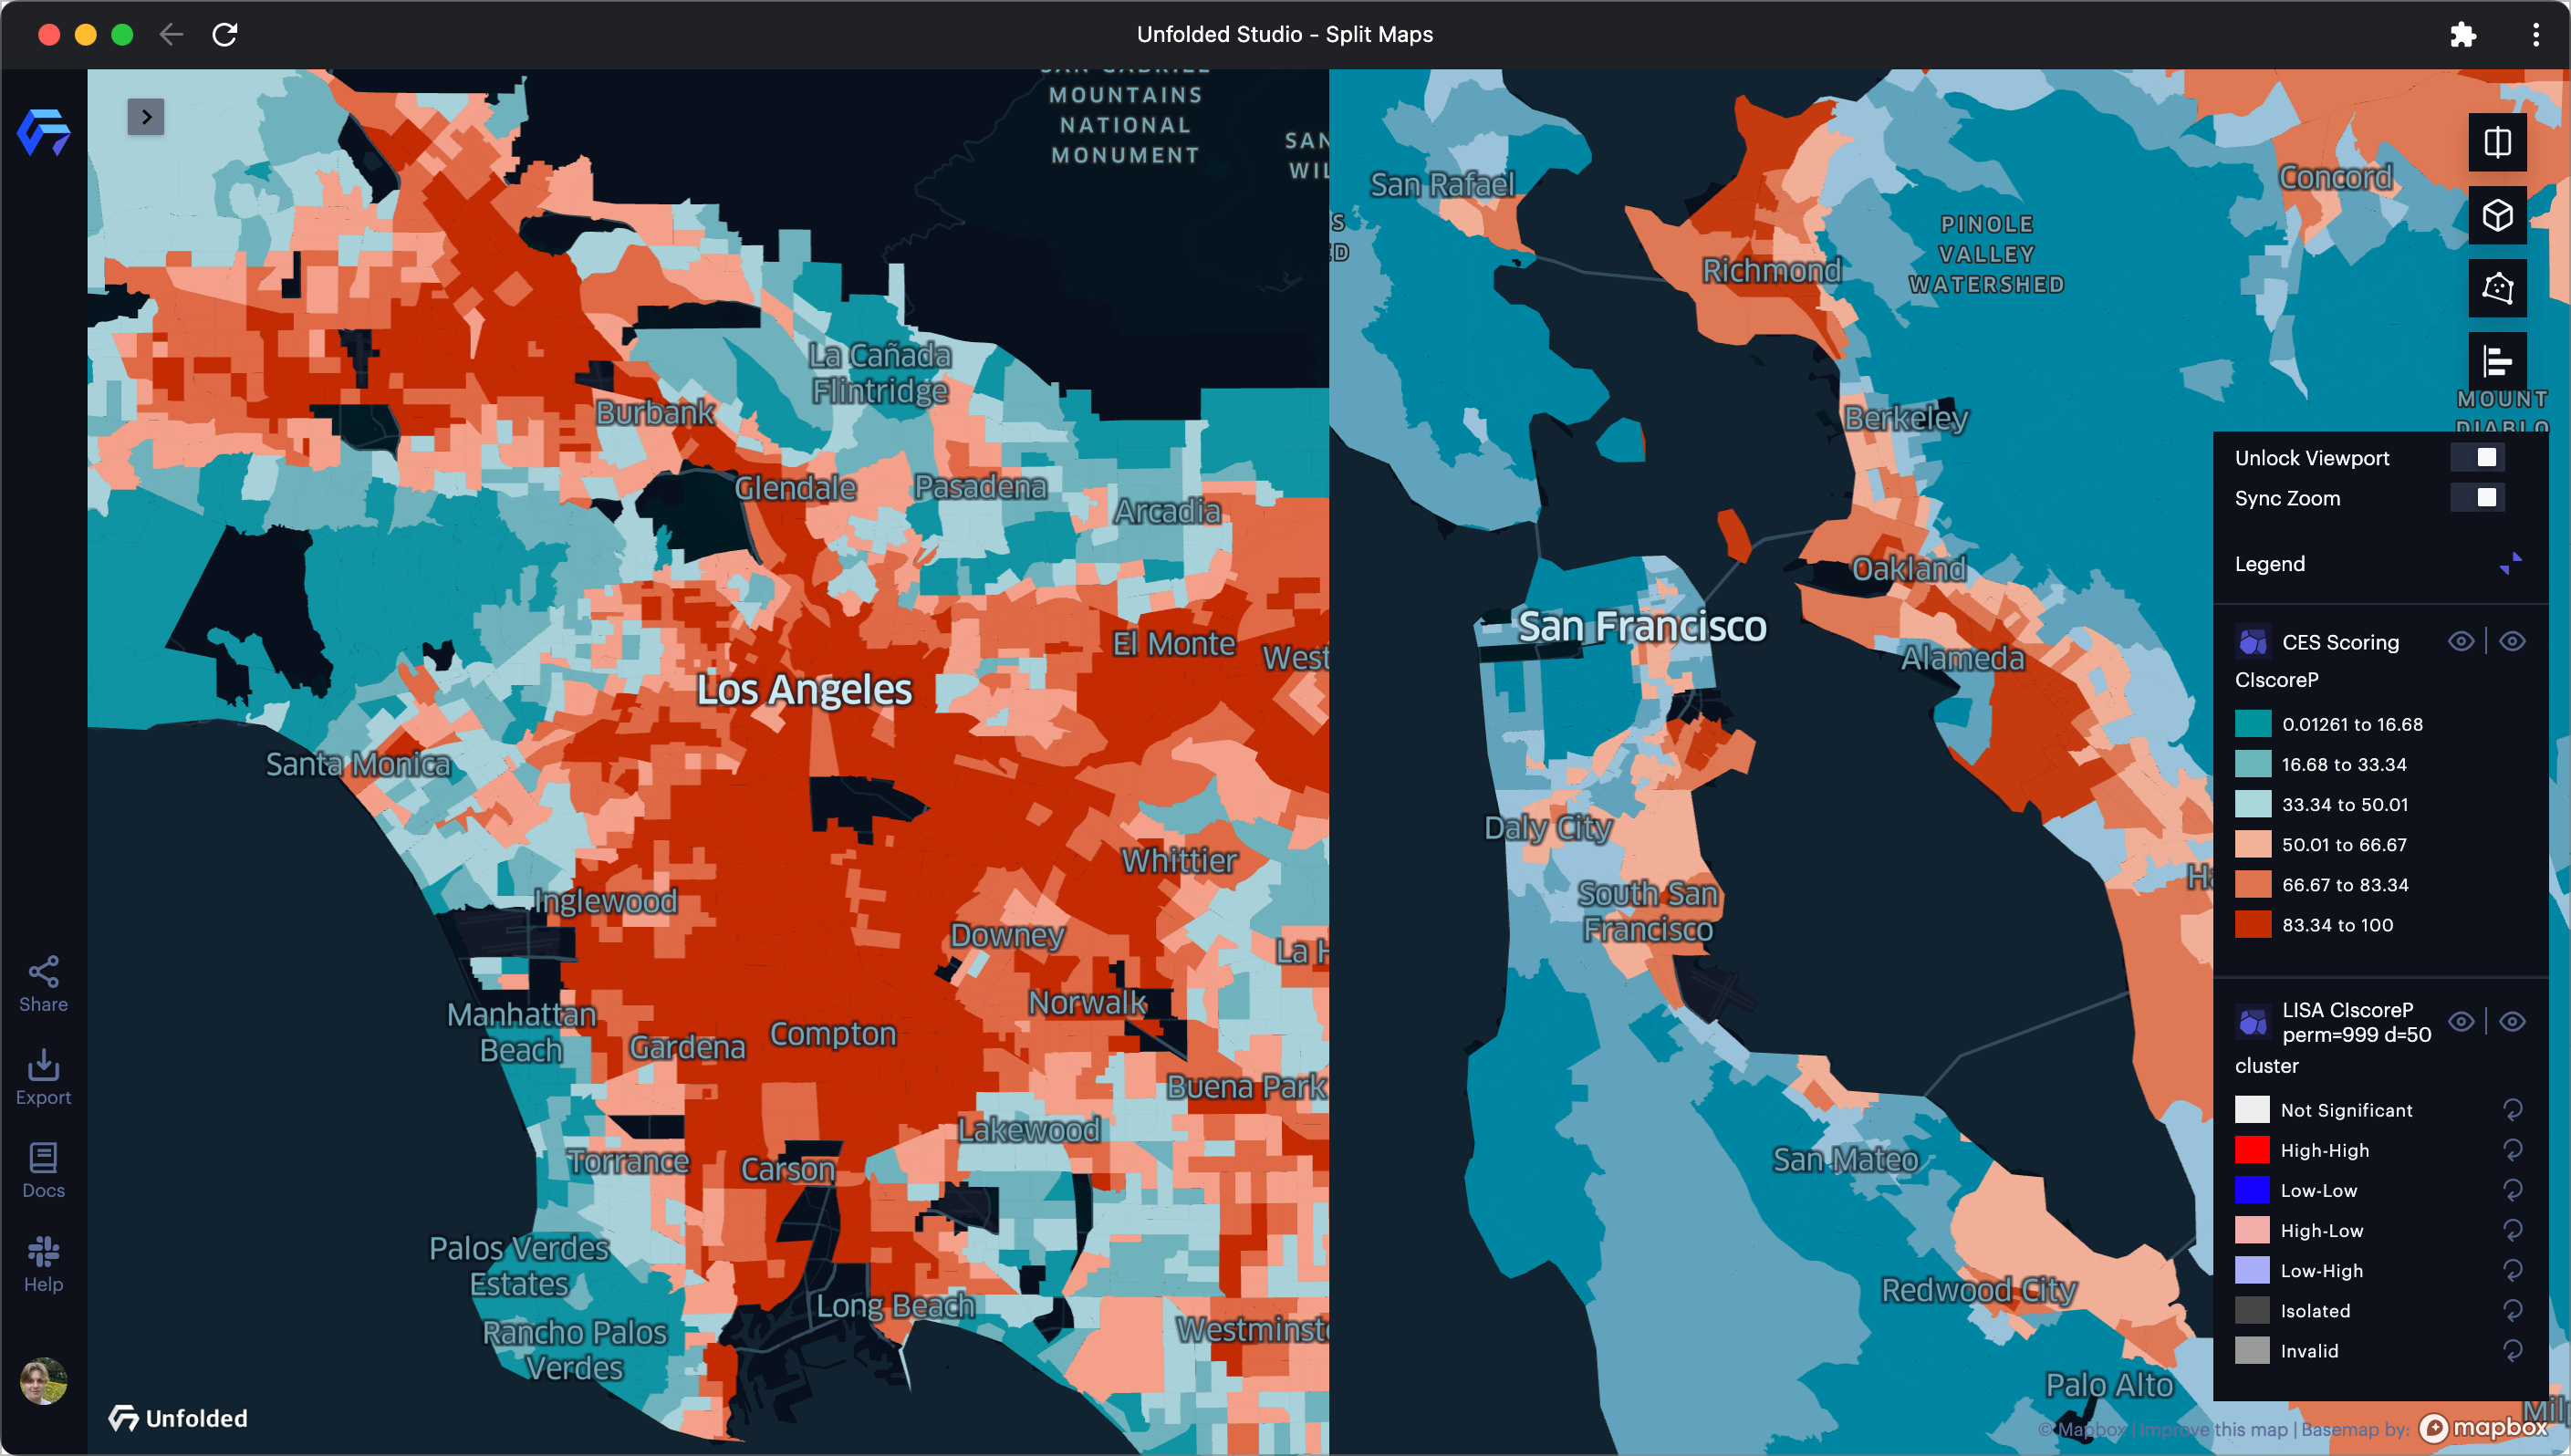
Comparing environment data in SF and LA using split maps with an unlocked viewport.
Swipe Maps Mode
Use Swipe Map mode to compare different data layers by dragging a sliding separator to reveal more of either of the two overlaid maps.
Since the maps are overlaid rather than side-by-side, it is often easier to detect subtle differences in the swipe mode.
Selecting Layers in Split Maps
To select which layers display in the split maps, open the Legend.
Click Hide Layer on layers you want to hide, and Show Layer on layers you want to show.
The left visibility icons toggle visibility on the left map, while the right visibility icons toggle visibility on the right map.
You can also drag and drop layers from the Layer tab directly onto split maps.
Updated 3 months ago