
Extract Data
Using the extract feature, you may save and preserve studio’s data operation results. Filter, join, group-by, and analysis results can be directly saved to your cloud account.
Follow these steps to extract a dataset from Studio:
1. (Optional) Apply filter, join, group-by, or analysis operations to the dataset.
Optionally, apply data operations to your dataset. The example below has a polygon filter of the Sunset district, and an age filter set to 15 years or older.
2. Click ⋮ More Options >> Extract to open the extract menu.
In this menu, you may deselect any unnecessary columns to exclude them from the new dataset. Optionally, click any column's name to rename it in the new, extracted dataset.
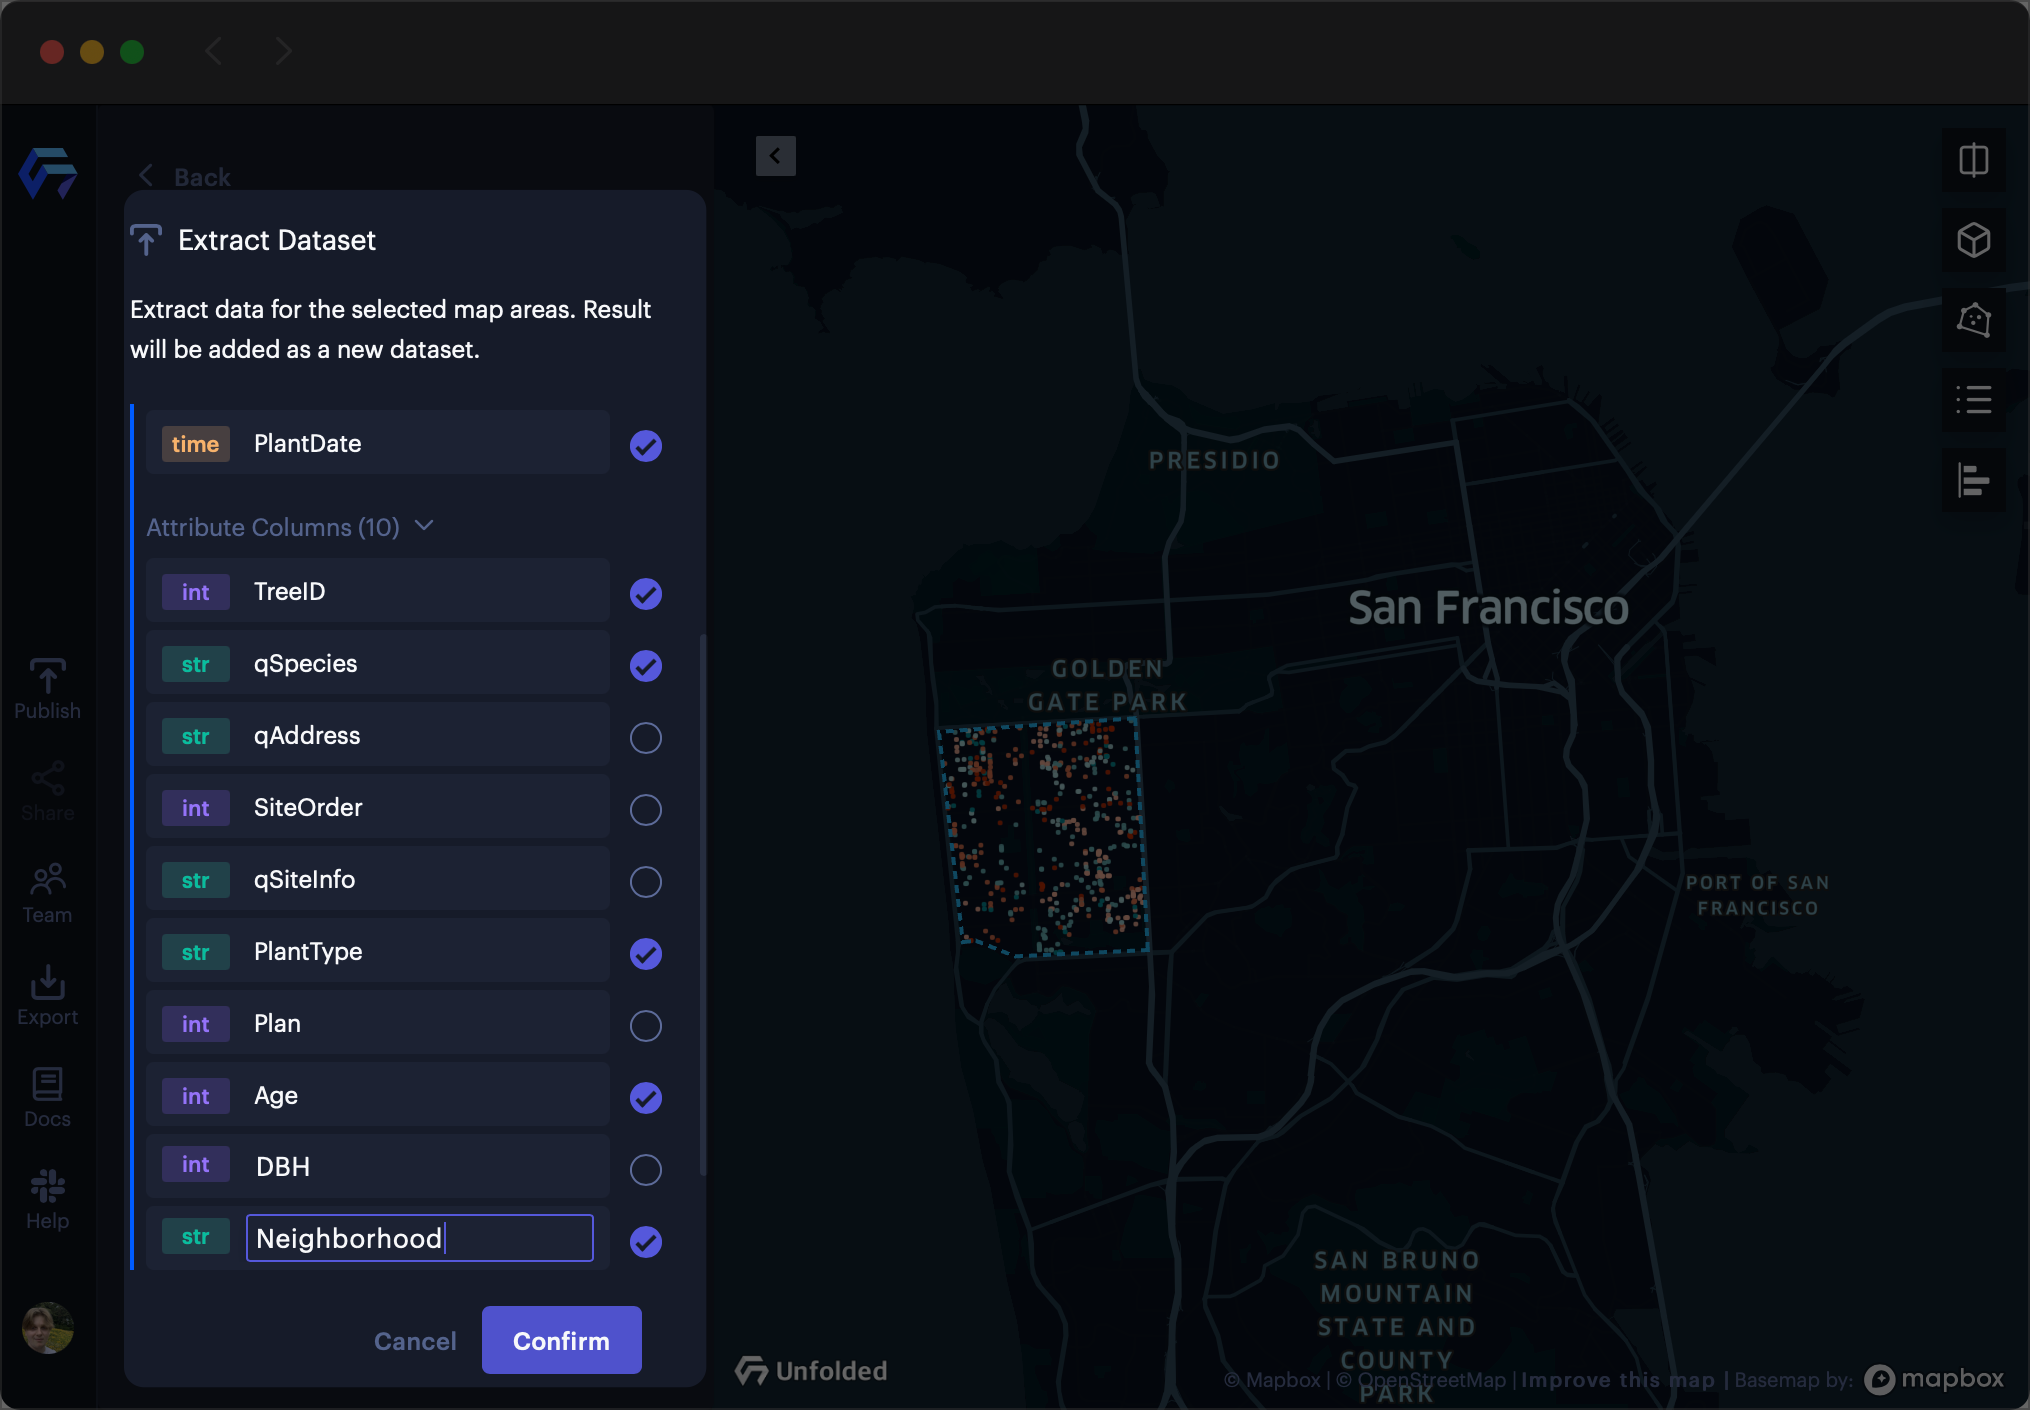
Deselecting columns to include in new dataset.
3. Click Confirm to initiate the extract operation with the selected columns.
4. Select Filtered Data, name the new dataset, then click Extract.
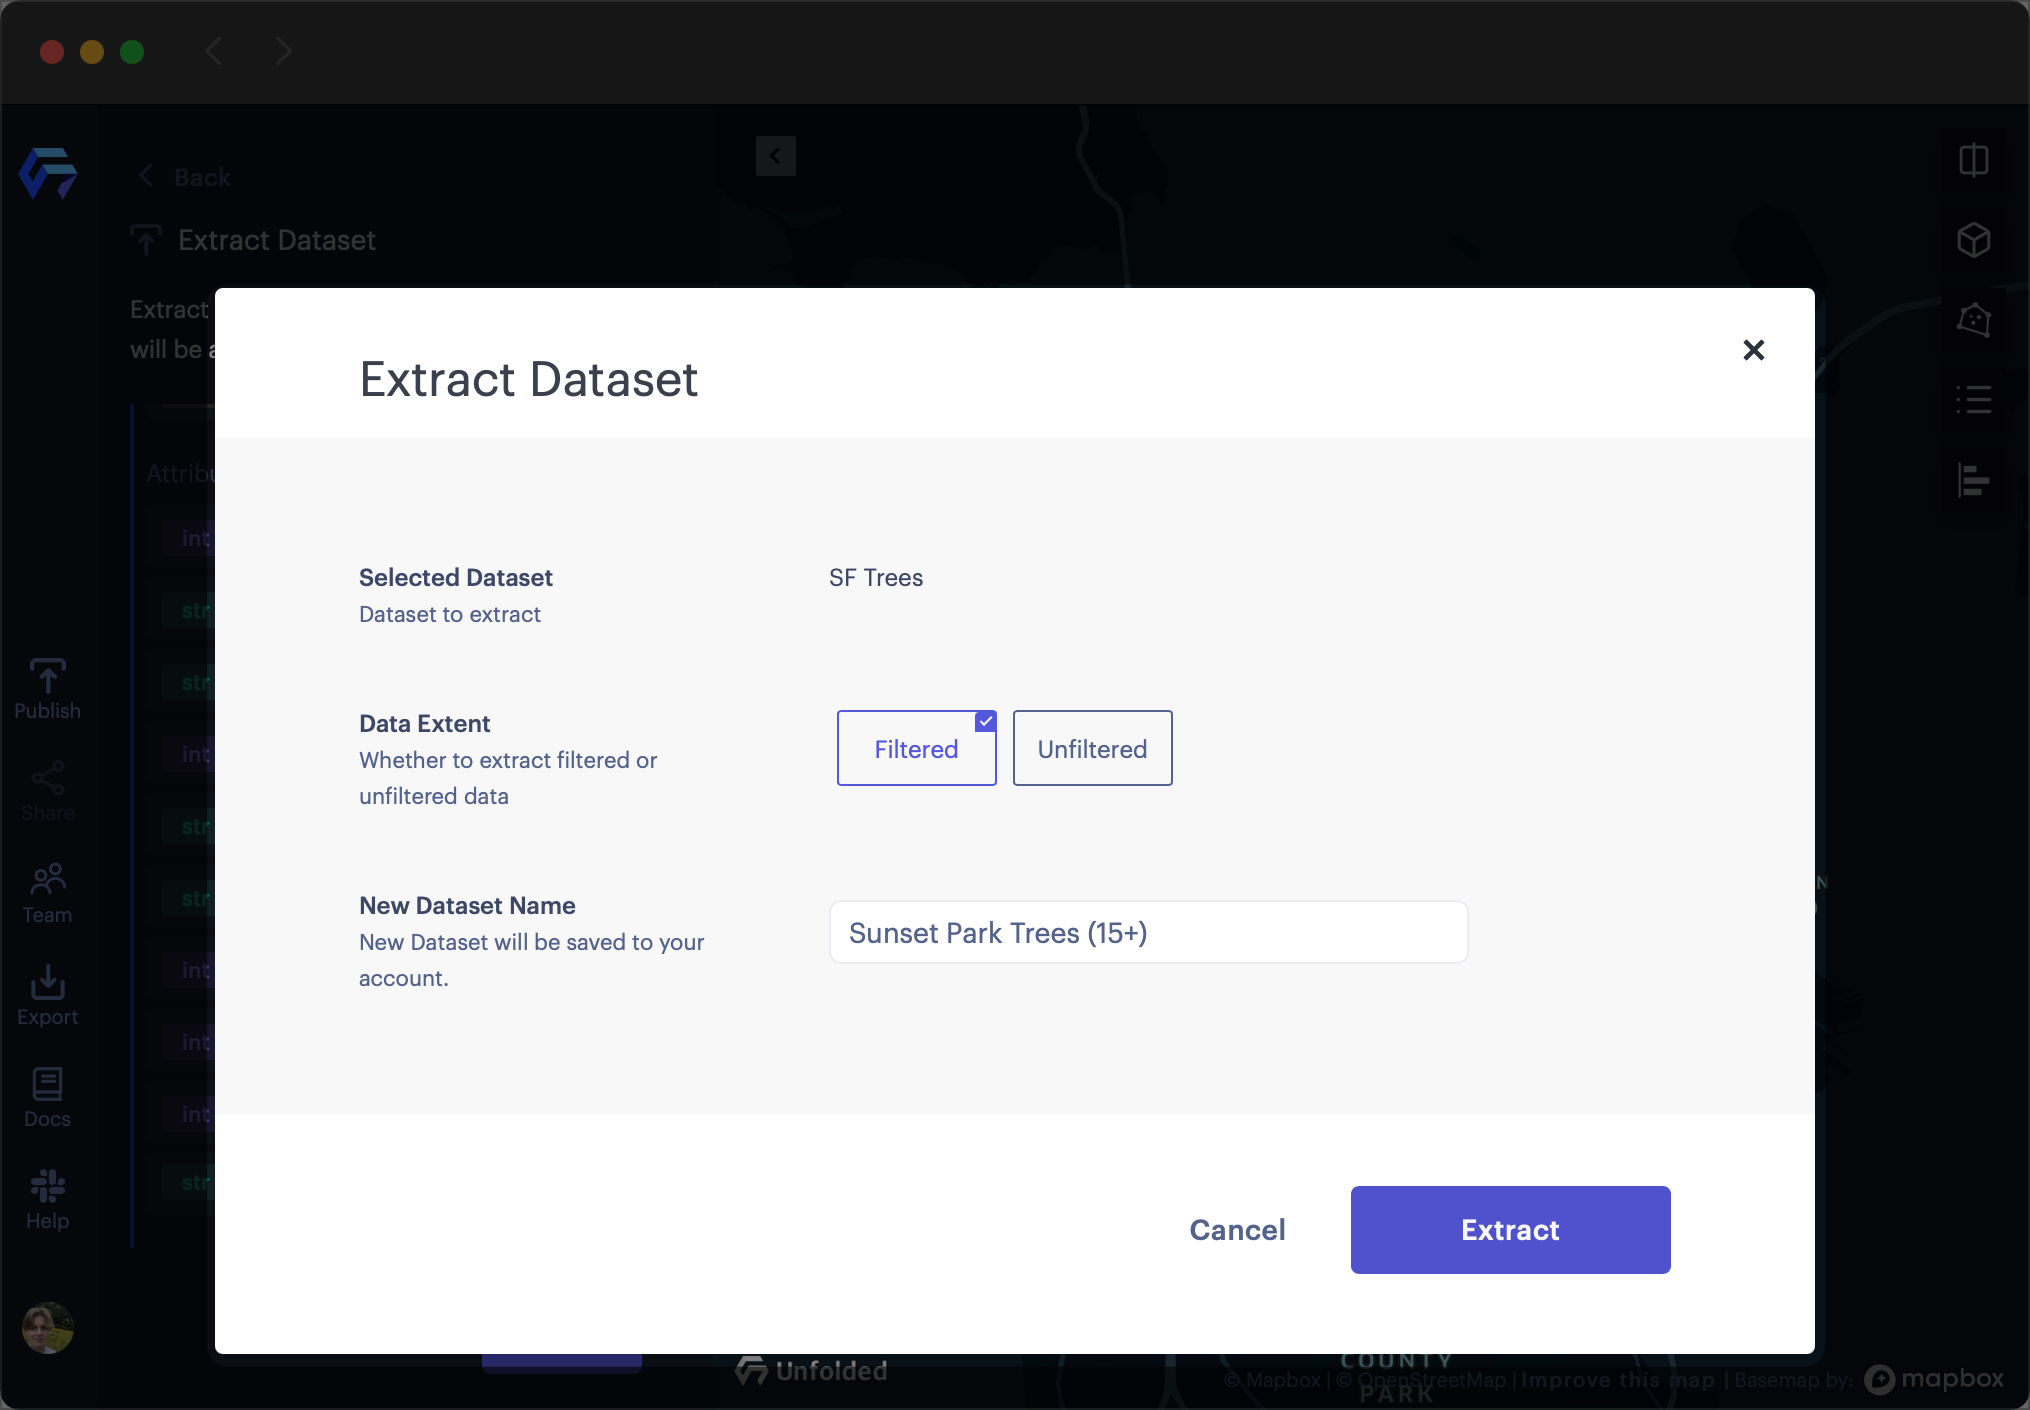
Selecting filtered data, then naming the new dataset.
Note: When replacing the original dataset with the extracted dataset, Studio will automatically reconfigure layers to reference the extracted dataset.
Upon completing the extract, replace the existing dataset with the new, extracted dataset. In the example below, the visualization only includes data from the area and subjects of interest.
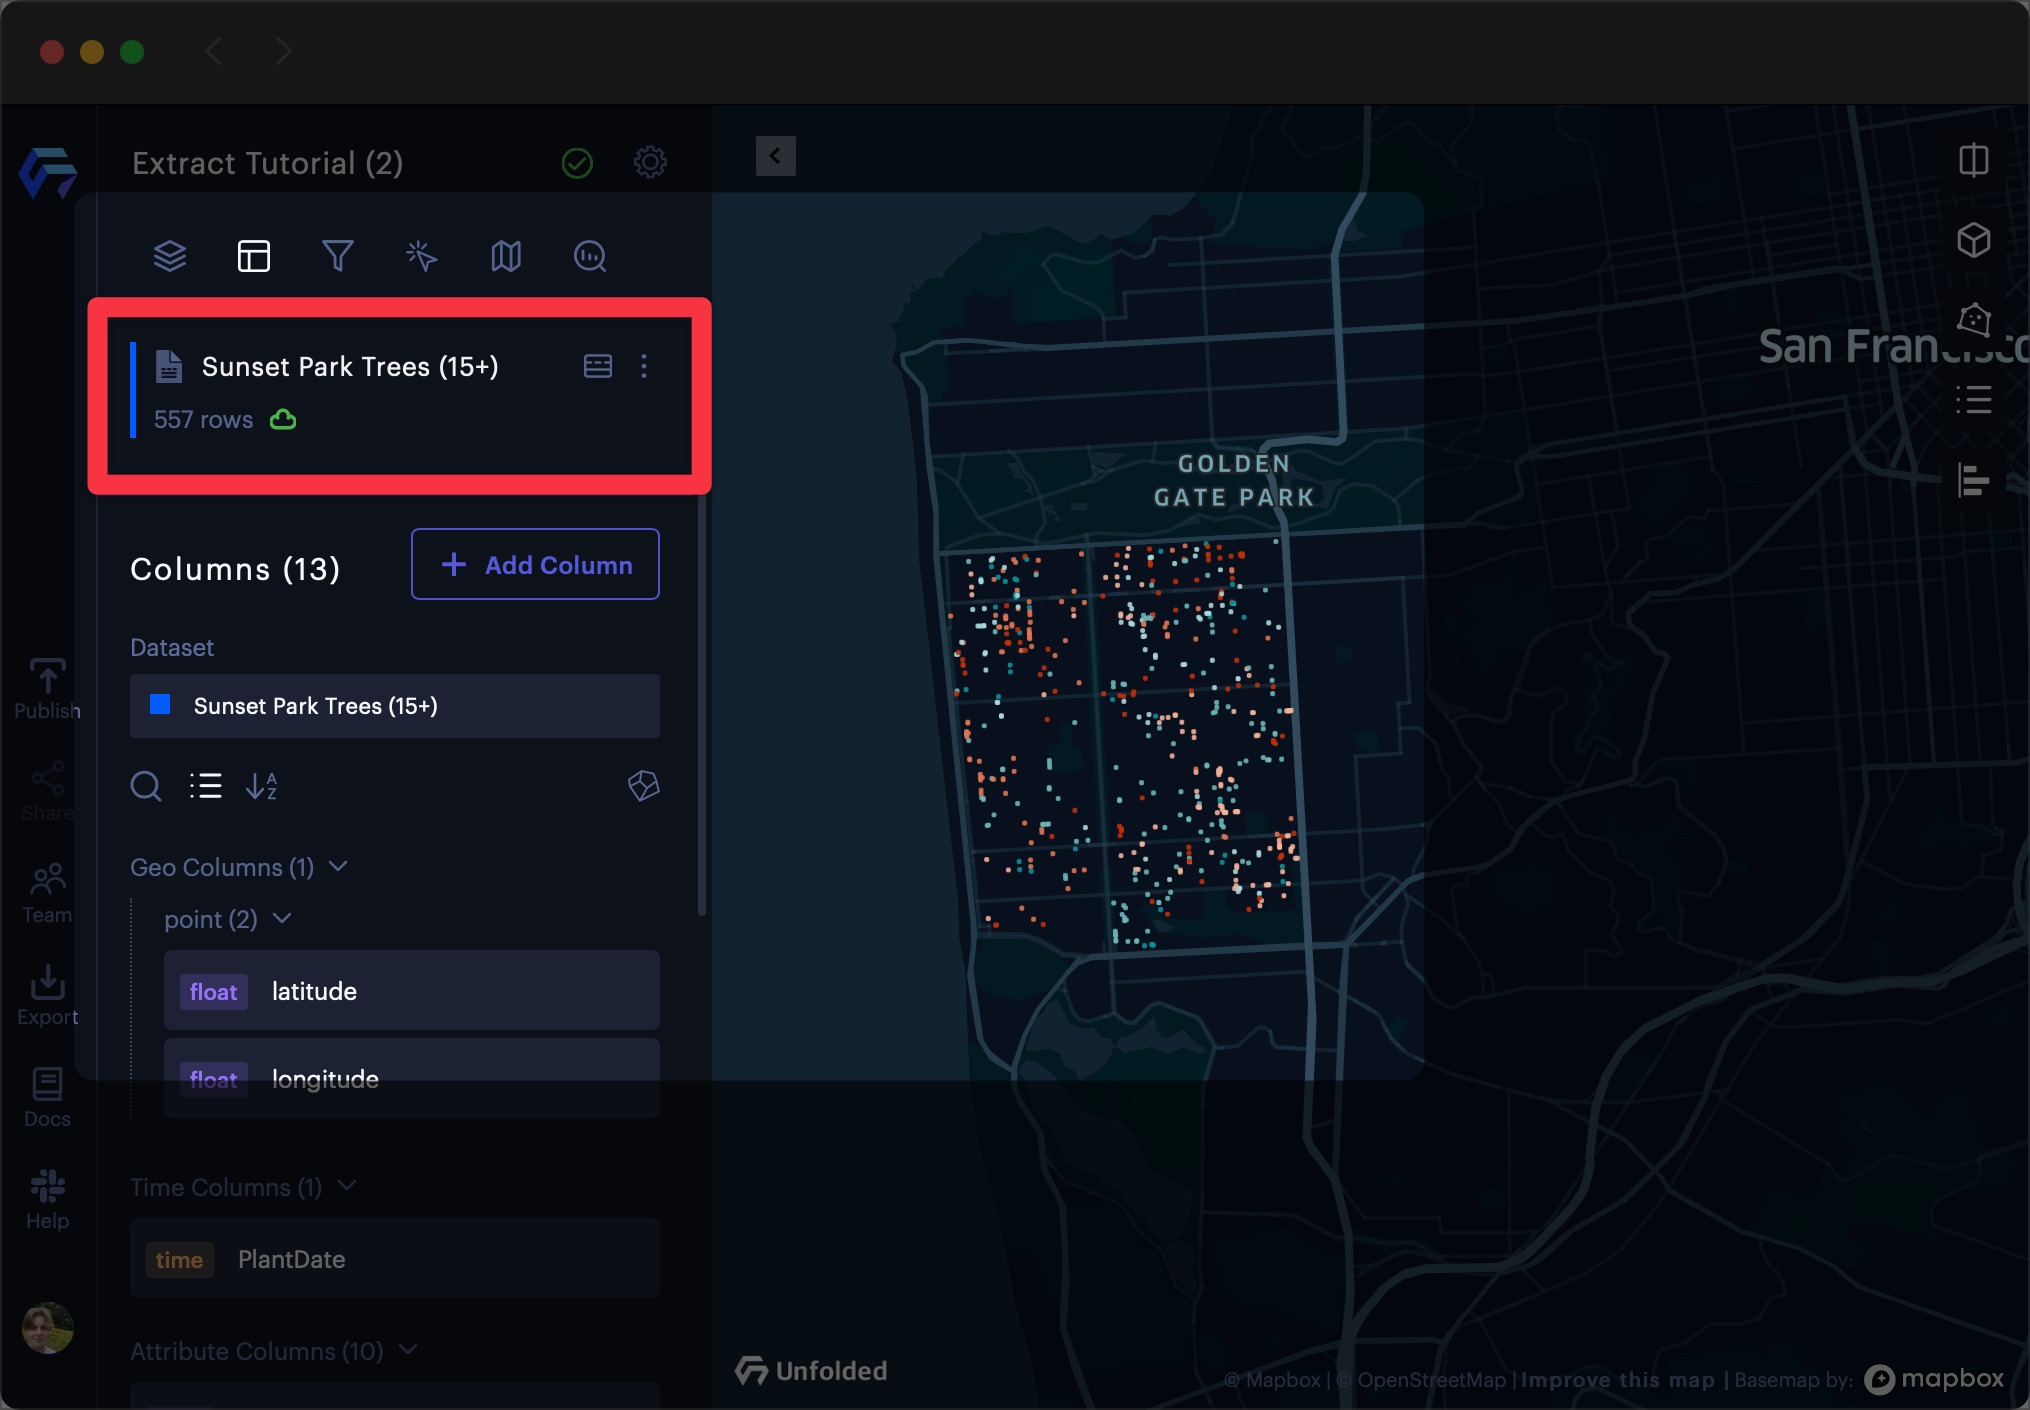
The extracted dataset replacing the original dataset.
Upon completion, the extracted dataset will appear on your cloud account as a stored dataset. You can use the extracted datasets in other maps independent of the original dataset.
Updated 3 months ago